-
Adafruit IoT Monthly: Banned Books, ADS-B Scanner, and More!
IoT Projects
Banned Book Library on a WiFi Smart Bulb
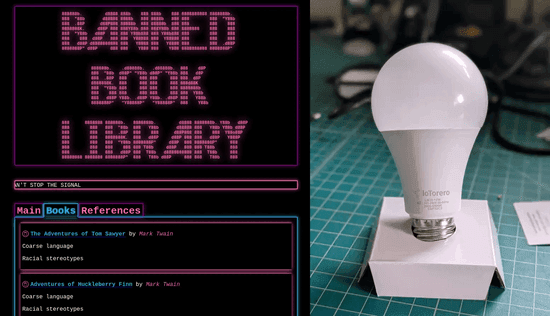
Rick Osgood modified a WiFi smart light bulb to host a banned book library. This is a highly creative reuse of existing IoT technology and the write-up is great. - richardosgood
Making an Autonomous Boat to Cross the Atlantic

Adafruit Forums user Autonomous_Sailboat built an autonomous motorboat to test a navigation system for an even more ambitious autonomous sailboat. - Adafruit Blog
Weathergotchi is an E-Paper Climate Logger

A cute, tiny, open-source climate logger that clips onto your backpack. The YouTube build is a fun watch, too. - Adafruit Blog
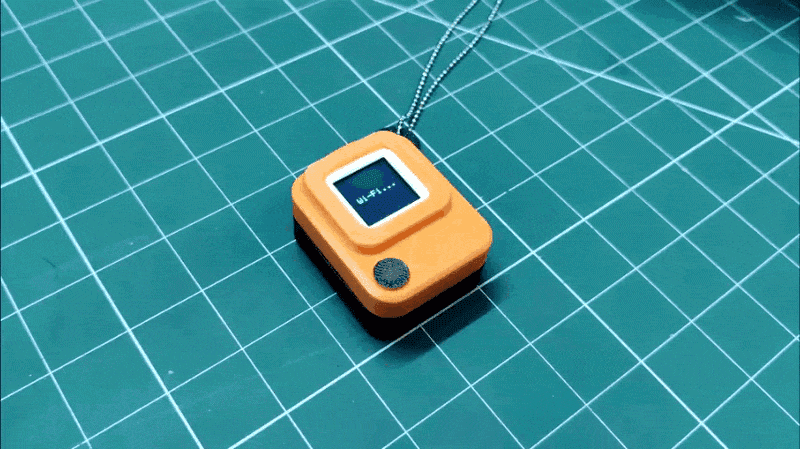
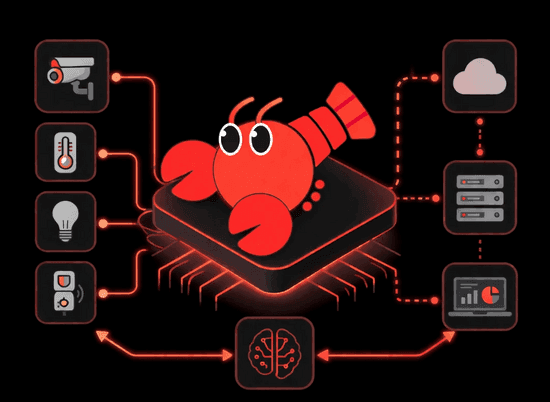
LLM Agent Embodiment Kit
Inspired by Olivia Zhu’s paper - “A Minimal Self-Perceiving Embodiment for Large Language Models”, this project gives an LLM agent access to a physical device with environmental sensors. Coupled with an agent skill, the physical embodiment kit runs in a closed-loop to sense and express its environment. - Adafruit Learning System
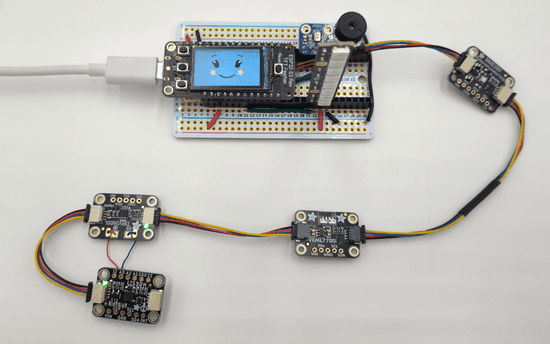
Tiny BLE Scanner
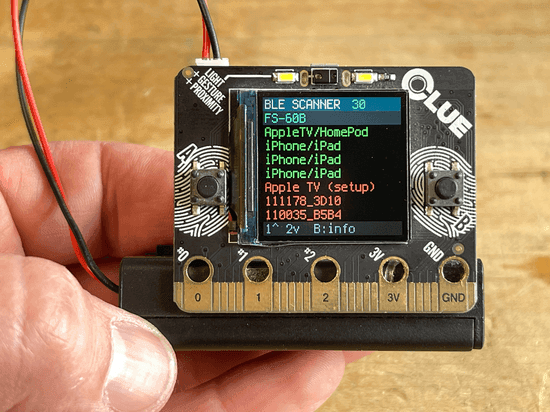
If you want to know what Bluetooth Low Energy devices are broadcasting, this tiny scanner picks up packets from nearby devices and displays them. - Adafruit Learning System
Plane Spotter — a Tactical ADS-B Desk Radar
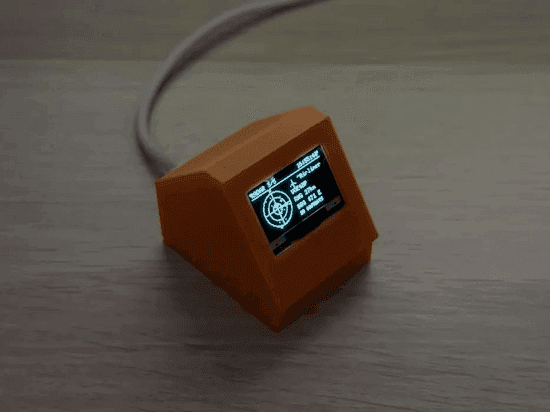
This project from Italian maker Danilo Cannas shows the aircraft flying above your home in real-time. - Instructables
IoT News and More!
Home Assistant Gets a Matter Upgrade

After four months of development, the newest version of Matter for Home Assistant has been released. The Matter server has been completely rewritten using the Matter.js library. This feature seems to benefit both Home Assistant, and Matter.js, making it a win for the Open Home Foundation. - home-assistant blog
-
Adafruit IoT Monthly: Temu IoT Doorbell, Cloud Ham Radio Repeaters, and More!
IoT Projects
Seedling Frost Alert Device
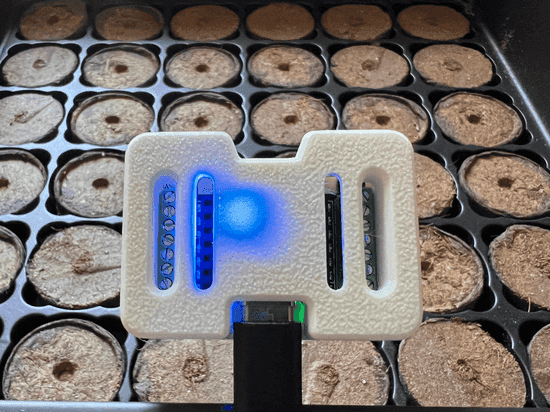
I have not written a guide in a while, so I decided to publish a quick and easy project. Instead of losing your seedlings to an overnight frost, protect them by building a frost alert device! A little sensor node glows blue when it is predicted to freeze overnight. Additionally, you can opt-in to receive SMS/email notifications. - Adafruit Learning System
Solar LED Light as a Mesh Node
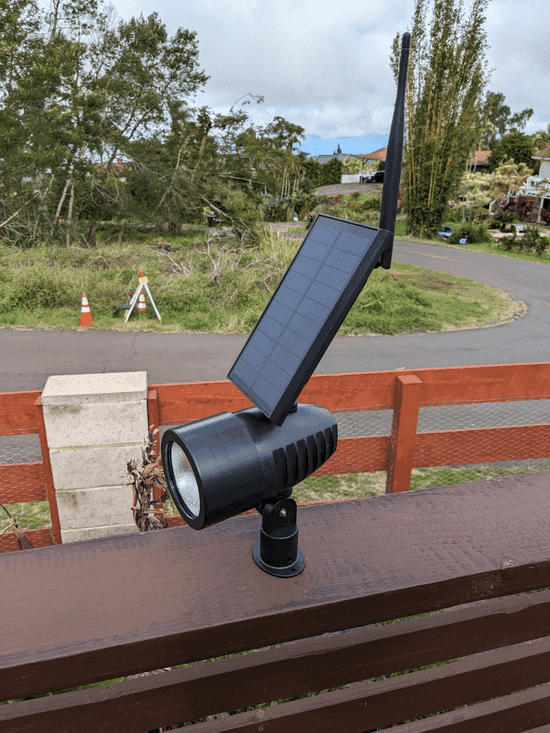
A creative hack for transforming a solar yard light from Lowe’s into a Meshtastic wireless node. - hackaday.io
Bambu Printer Status Display
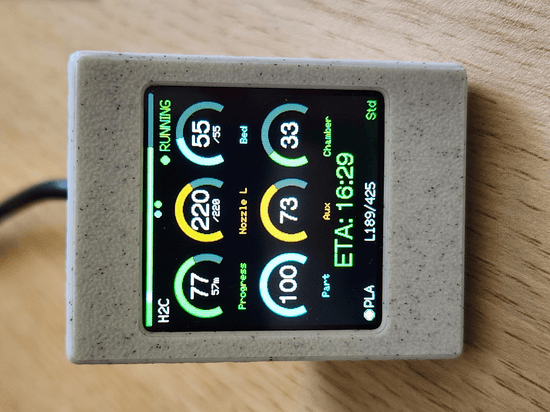
A real-time, physical, dashboard for monitoring a Bambu Labs 3D printer. - GitHub
Logging Ham Radio repeater usage with a Baofeng
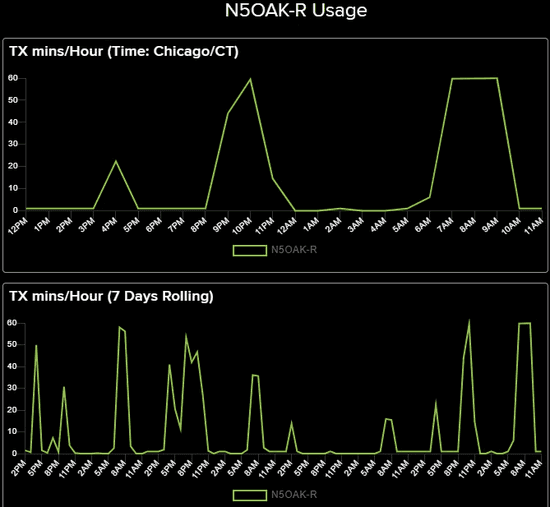
Tracking usage of the Austin N5OAK Ham Radio Club’s repeater by logging transmissions to the Cloud using a Baofeng radio. - whiskeytangohotel
Using ESP-Claw with a Local LLM

ESP-Claw is a new tiny AI device for Espressif microcontroller-based boards. After quickly hitting the rate-limit with a cloud LLM service, Anne looked at using it with a Local LLM model instead. - whiskeytangohotel
IoT News and More!
Qualcomm QCC74x
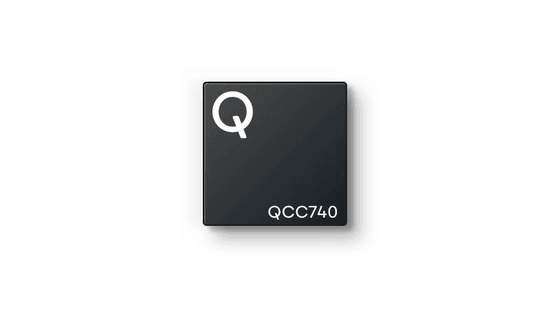
With WiFi 6, Bluetooth 5.4, Thread/Zigbee, and a 352MHz RISC-V CPU, Qualcomm’s QCC74x MCU looks like it’ll directly compete with the ESP32 series in terms of performance and features. - HackADay
Anyone on The Internet Can Ring your (Temu) Doorbell
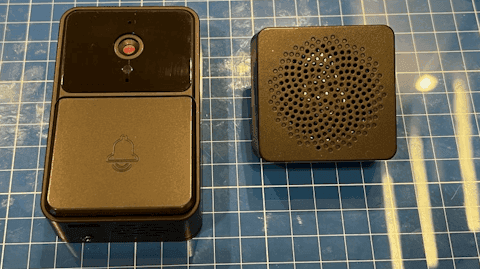
Temuri Takalandze looks at a $12 smart doorbell bought on Temu. By the end of their research, they could “silently steal any of these doorbells off its owner’s account”. - CircuitDojo Blog
You’ve seen the Chip Shortage and the Memory Shortage, now prepare for the PCB Shortage
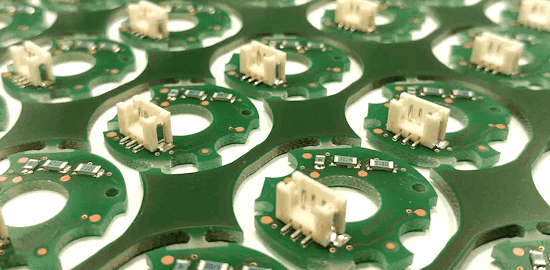
The conflict in the Middle East has disrupted supplies of crucial raw materials and pushed up prices of the printed circuit boards used in almost all electronic devices. - Adafruit Blog
-
Adafruit IoT Monthly: ESP-Claw, License-Free IoT Spectrum, and more!
IoT Projects
Focus Saver
Distracted by the background noise of their phone, this project helped AahanSharma stay focused by minimizing distractions. This device silences their phone and only alerts them when an important email arrives. While the Brick is a commercially available equivalent of this project, it lacks a display (which I find useful). - Adafruit Blog
ESP-Claw
There’s been plenty of OpenClaw projects for the ESP32, but this one is officially from Espressif Systems. The only thing to note is the extremely strict requirement (I learned of when I tried to get around it) for 8MB flash and 8MB PSRAM, which may limit its use for lots of ESP32-x variants. - ESP-Claw
A Website, hosted on an ESP32
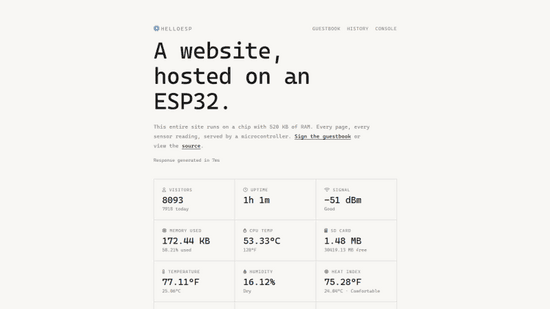
The HelloEsp website is hosted on an ESP32 chip with 520KB of RAM instead of a traditional web server. Every aspect of the website is serviced by the ESP32 microcontroller. - HELLOESP
ESPectre - Detecting Human Movement
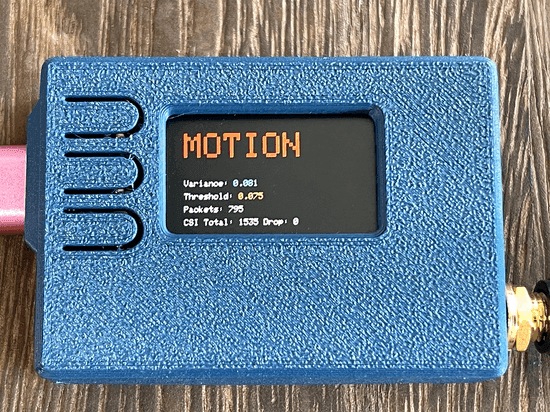
The Espectre project uses WiFi spectral analysis (CSI) to detect human movement. Unlike PIR sensors or cameras, Espectre can detect humans through walls and in the dark. This project ported Espectre to Arduino, to use it as a standalone component without needing a Home Assistant system. - Adafruit Learning System
Using a Raspberry Pi as a Router
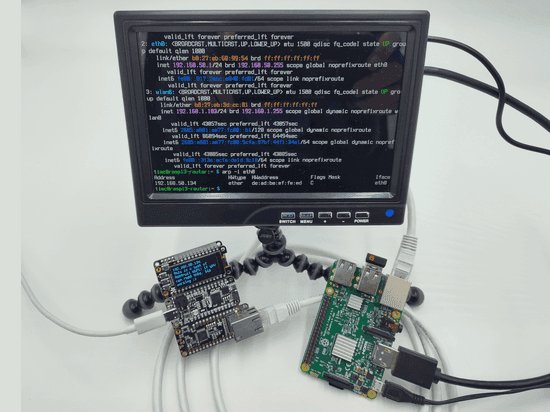
Did the recent FCC rulings worry you about buying networking hardware? Follow this guide to use a Raspberry Pi as a router. - Adafruit Learning System
ESP-NOW Walkie Talkies
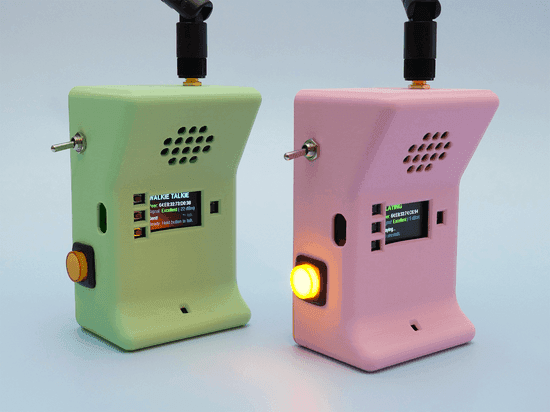
Using the ESP-NOW wireless communication protocol to send and receive audio data, this project created a pair of walkie talkies. - Adafruit Learning System
IoT News and More!
The New License-Free IoT Spectrum: In-Depth Investigation into NR+

NR+ is a new license-free wireless standard that unlocks dedicated global spectrum for IoT. Psychogenic Technologies has the most in-depth investigation into this standard on the Internet. This is the type of technical content I love writing about - a 1.3 hour video that covers every aspect of this new standard, from the specification to building applications with it. - Psychogenic Technologies
Lion: A Self-Hostable IoT Server for Zephyr Devices
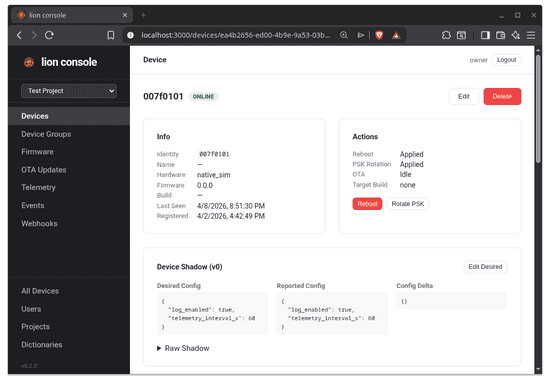
Lion is a self-hosted IoT backend. It’s open source, supports CoAP + DTLS, and provides a sensible way to do OTA firmware updates. This blog entry is the “engineering story” of why specific design decisions were made. - CircuitDojo Blog
-
Adafruit IoT Monthly: LEGO SMART Brick, Local Voice Control, and more!
IoT Projects
LEGO SMART Brick Reverse Engineering and Teardown
LEGO released a new product earlier this year, the SMART brick. The SMART brick uses a protocol called “BrickNet” to communicate with other bricks. The brick itself incorporates 25+ patents. The lego brick - something traditionally understood as a building block - is now a complex, black-box, piece of technology. The Maker audience is understandably interested in what’s inside the box, how it can be extended and incorporated in their projects. On YouTube, EvilmonkeyzDesignz shared a full teardown showing the inside of the SMART brick. Over on the Adafruit blog, we posted a draft about the potential process of reverse engineering the BrickNet protocol.
No-Code Snowfall Tracker
Winter weather can be unpredictable, especially when you’re trying to decide if it’s time to break out the shovel or if you can wait another hour. This project is a tiny, Internet-connected, desktop display that monitors real-time snowfall. - Adafruit Learning System
Local Voice Control on Raspberry Pi

The moonshine voice project is a fast, local, open-source AI project for live-audio capture and transcription. Tim C’s guide shows how to run Moonshine on a Raspberry Pi, and uses Moonshine’s API to capture and transcribe audio, and changes the NeoPixel color based on the transcribed text. We’re probably going to see a lot of these local-first approaches to voice control in the future as models mature and are optimized for edge deployment. - Adafruit Learning System
E-Ink Ship Tracker
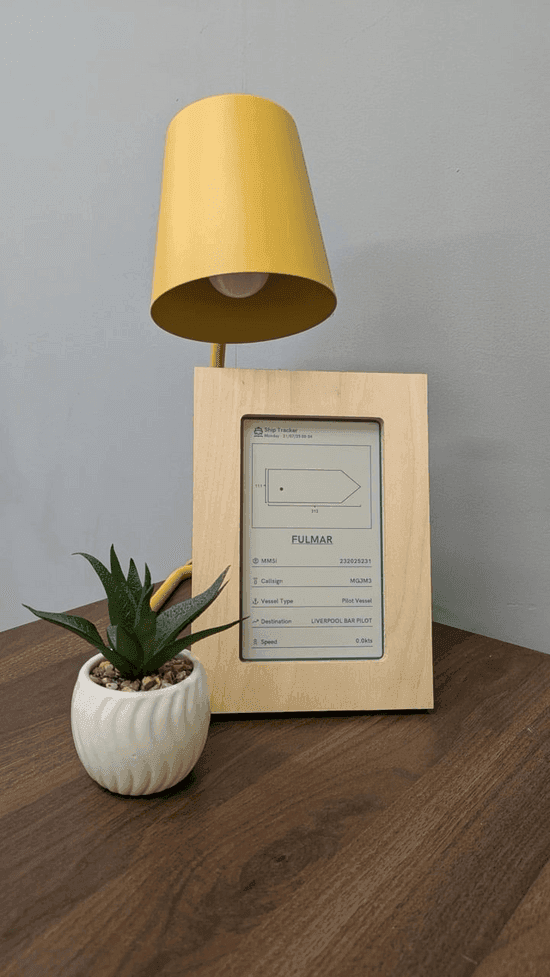
This 7.3” E-Ink display is connected to an “Automatic Identification System” (AIS) receiver, which is a system used by ships to broadcast their location and other information. The E-Ink display in a nice frame passively shows the current location of nearby ships. This project could also be performed without the USD $85 AIS receiver, instead using an API to track ships. - Adafruit Learning System
Banamera Camera - Edit Photos with Voice
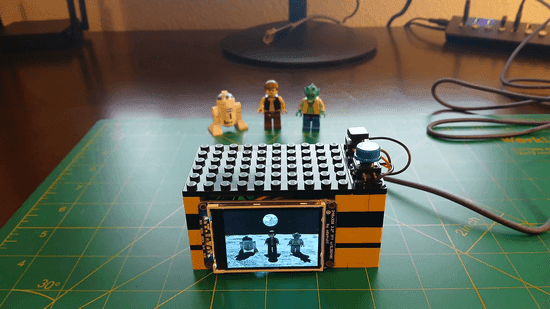
Banamera is a digital camera that can take a picture and make edits using Google’s Nano Banana’s photo editor API. They demonstrated it by taking a picture of LEGO minifigures and applying a real-time edit where a background of the moon is added. - HackaDay.io
IoT News and More!
Adafruit IO Dashboard Map Block
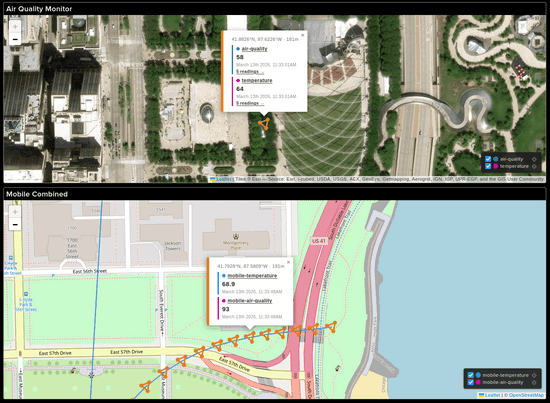
We shipped a major update to the Adafruit IO Dashboard maps block. In short, maps now support up to 5 feeds with per-feed customization (colors, icons, path lines), smart marker clustering for nearby points, auto-centering with fit bounds, a “follow feed” mode that tracks new data points, a legend, the ability to publish data directly by clicking the map, and cleaner popups. - Adafruit Blog
Reachy Mini Robot
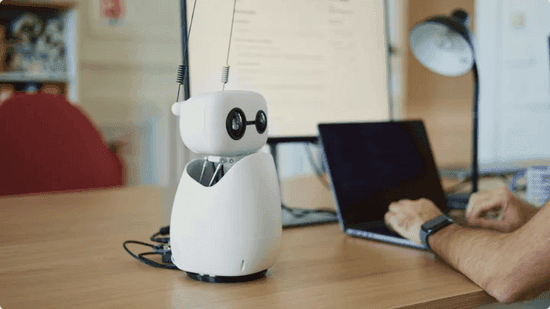
I spent a while going back and forth on this one and it lands in the “IoT News and More” section, it is a commercially available kit. I also think it’s a pretty exciting platform for future robotics projects. Reachy Mini has 6 degrees of freedom, a camera, a microphone array and an open-source software stack (including a simulator). - Reachy Mini
Ikea tried to build a smart home for everyone — here’s why it’s not working yet
I covered Ikea’s recent inexpensive Matter smart home devices towards the end of last year. Jennifer Pattison Tuohy at The Verge writes how users are struggling to get these new devices (which promised low prices and reliability) connected to their home. - The Verge
This is why I keep buying ESP32 boards instead of more smart home gadgets
Samir Makwana details why he prefers to buy ESP32 boards and build his own smart home gadgets instead of buying pre-built devices (like the Ikea ones). - XDA Developers
Golioth Joins Canonical

Our friends at Golioth, a specialized IoT cloud platform, have been acquired by Canonical, the company behind Ubuntu. For the IoT and open source ecosystems, this appears to be a great addition and we’re excited to see how Golioth’s platform evolves under Canonical’s open-source umbrella. - Golioth Blog
-
Adafruit IoT Monthly: Accidental Antennas, Hardware Catalog, and more!
IoT Projects
Accidental Antenna Design
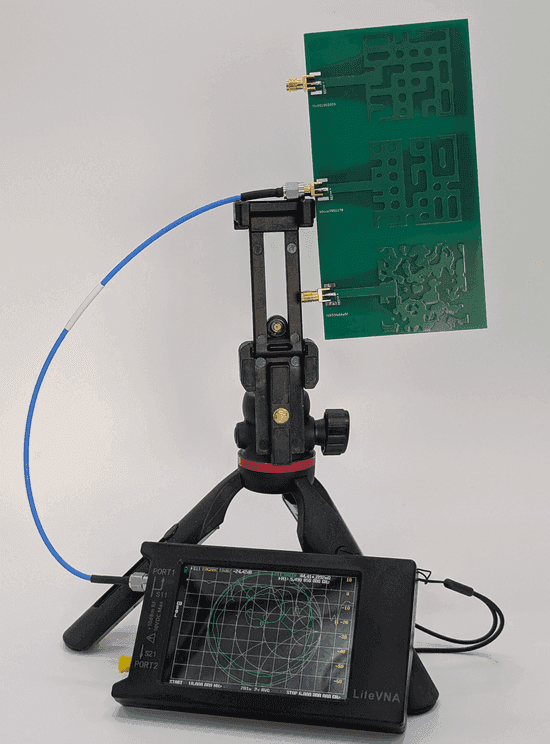
To most engineers, antenna design is “one of those witchcrafts you either know how to do, or you just don’t”. Janne’s research lets a cluster of Nvidia B200 GPUs brute-force antenna designs for manufacturing, the results are pretty surprising. - somethingfromnothing
ePaper Camera
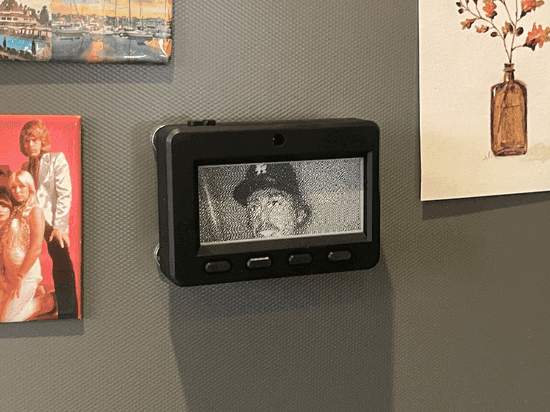
Snap lo-fi pictures and transmit them over WiFi to your ePaper photo frame! - Adafruit Learning System
OpenClaw on Raspberry Pi
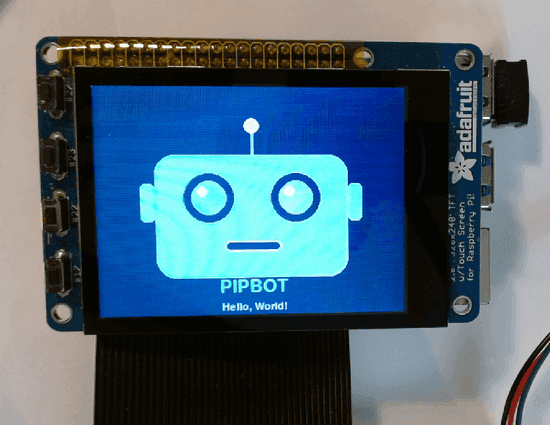
An experiment for giving an LLM agent full control over a Raspberry Pi and letting it interact with the physical world using peripherals such as a TFT display, sensors, and a USB camera. - Adafruit Learning System
Analog Clock with NTP Time
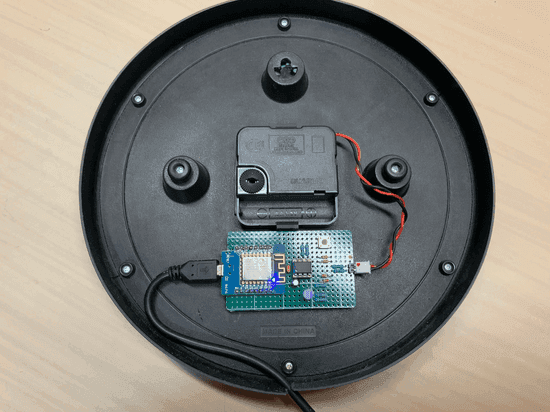
This project modifies an analog clock (the ones with hour and minute hands) to connect to a network time server, allowing it to display incredibly accurate time. - GitHub
Hacking the Adafruit IO Library
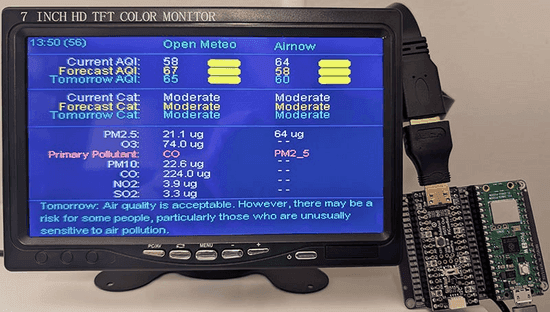
Our IoT Service, Adafruit IO, recently added a new API for grabbing air quality data from Open-Meteo (for international users) and AirNow (for US users). Danak hacks apart the CircuitPython library to add support for this new API. - Adafruit Learning System
IoT News and More!
WipperSnapper Hardware Catalog: “Works with WipperSnapper”
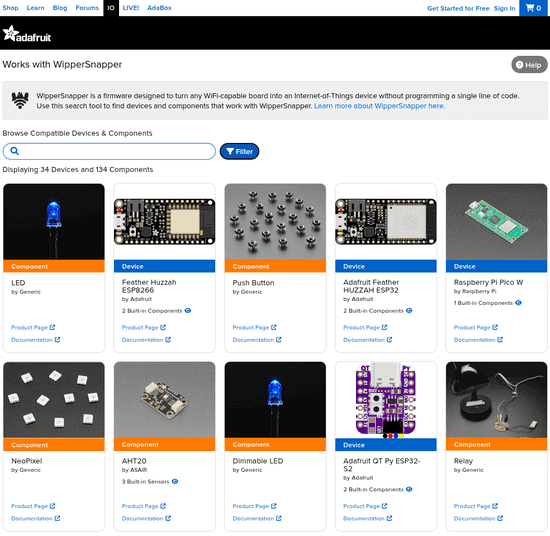
If you’ve ever thought to yourself, “I’d like to try out Adafruit’s no-code WipperSnapper firmware for my next project, but I’m not sure what hardware I can use!”, we’ve got just the thing for you! - Adafruit IO Blog
My smart sleep mask broadcasts users’ brainwaves to an open MQTT broker
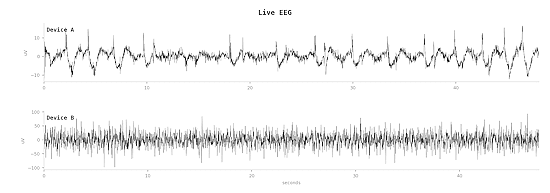
Aimilios Hatzistamou recently got a smart sleep mask from Kickstarter. What was not expected was the ability to read strangers’ brainwaves and send them electric impulses in their sleep. - Adafruit Blog
« Newer
Older »