-
Loading Data from Adafruit IO into Pandas

If you are logging sensor data to Adafruit IO, you may have a need to do a deeper examination of your data. One popular option is the pandas data analysis library for Python.
Here is a description from the pandas website:
pandas is an open source, BSD-licensed library providing high-performance, easy-to-use data structures and data analysis tools for the Python programming language.
Let’s take a quick look at how to load data into pandas from a public Adafruit IO feed.
Setup
You will need Python 3.5 installed, and you will also need to install pip if it wasn’t included with your Python install.
Once Python and pip are installed, you can install pandas by running:
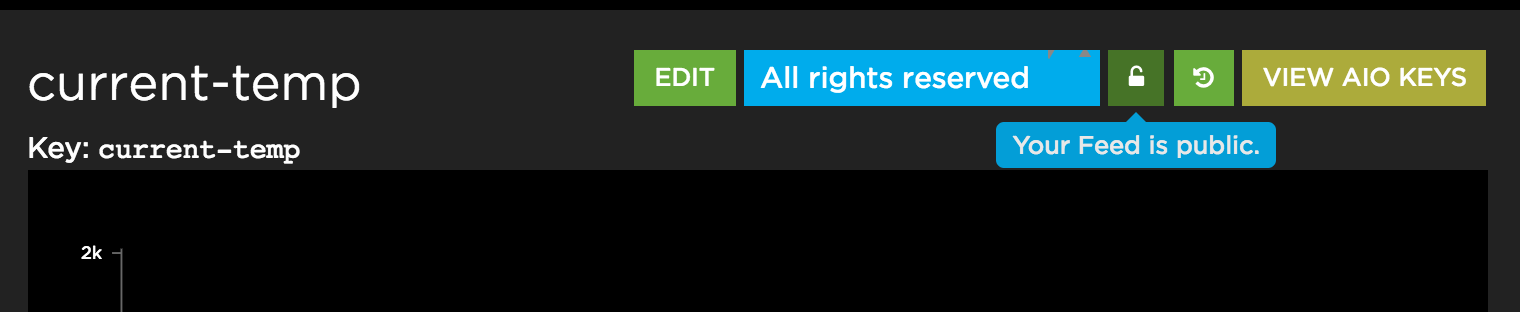
$ pip install pandasFor this example, we will be pointing pandas at a public Adafruit IO feed. If your feed is currently private, you will need to make it public.
Importing Feed Data
To get started, you will need to open up a new Python file in your favorite editor, and start by importing pandas:
import pandas as pdNext, we need to pull in feed data via the
read_jsonmethod. ReplaceUSERNAMEandFEED_KEYwith your Adafruit IO username, and the key of the feed you wish to load.feed_data = pd.read_json('https://io.adafruit.com/api/v2/USERNAME/feeds/FEED_KEY/data')If you are not sure where to find your feed’s key, you can find it below the feed name.

Date Conversion
Next, we will convert the
created_atcolumn from a string todatetime, and set it as the index for the data frame:feed_data['created_at'] = pd.to_datetime(feed_data['created_at'], infer_datetime_format=True) feed_data = feed_data.set_index('created_at')Plot Values on a Chart
Now that the data has a valid date column, we can load the feed values into a time series, and plot the values:
values = pd.Series(feed_data['value'])
values.plot()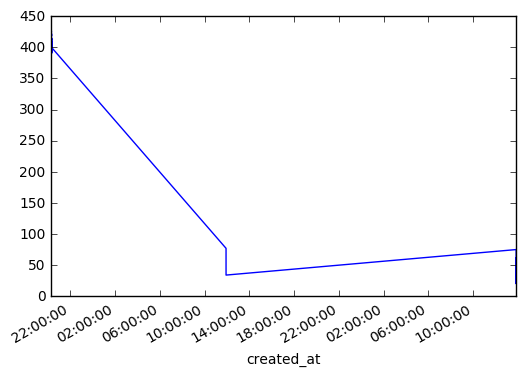
Another simple example is to resample the data into daily averages, and plot them on a bar chart:
daily = values.resample('1d').mean()
daily.plot(kind='barh')
You can do a wide range of useful operations with Time Series, and you should refer to the documentation for more details.
-
State of IO 11.23.16
Here are the stats for the past week:
* 56.1 million inserts of logged data in the last 7 days * 18,941 users * 14,043 online feeds (49,321 feeds total) * ~90 inserts per second via MQTT * ~10 inserts per second via REST API -
State of IO 11.07.16
Here are the stats for the past week:
* 54.7 million inserts of logged data in the last 7 days * 18,147 users * 13,309 online feeds (46,968 feeds total) * ~77 inserts per second via MQTT * ~10 inserts per second via REST API -
State of IO 10.05.16
Here are the stats for the past week:
* 48.2 million inserts of logged data in the last 7 days * 16,798 users * 12,383 online feeds (42,857 feeds total) * ~75 inserts per second via MQTT * ~10 inserts per second via REST API -
SSH Config Includes
OpenSSH version 7.3 introduced a very handy
Includefeature, which is great for people who have to manage connection info for multiple servers. This makes it easy for us to generate updated SSH configs via AWS CLI for the multiple EC2 instances that serve Adafruit IO.Here is how you can use
Includeto pull in separate SSH config files from your main~/.ssh/config. First, you will need to install OpenSSH version 7.3 or higher. If you are using Linux, you will need to install version 7.3+ via your package manager (yum,apt-get, etc), or build it from source.On OS X, you can do this via homebrew:
$ brew install homebrew/dupes/opensshConfirm that you are now running 7.3 or higher by running
ssh -V:$ ssh -V OpenSSH_7.3p1, OpenSSL 1.0.2j 26 Sep 2016Now you can create a new child config file in
~/.sshusing a text editor. For example, we can create an example child config at~/.ssh/pi_configand add configuration info just as we would in the main SSH config file:Host pi-1 HostName 10.0.0.10 User pi IdentityFile ~/.ssh/pi_cluster Host pi-2 HostName 10.0.0.11 User pi IdentityFile ~/.ssh/pi_cluster Host pi-3 HostName 10.0.0.12 User pi IdentityFile ~/.ssh/pi_clusterFrom your main
~/.ssh/config, add the following line at the top:Include ~/.ssh/pi_configYou should now be able to connect to your servers as you normally would:
$ ssh pi-1That’s it! Check out this OpenSSH feature request if you would like more info.