
Adafruit IO API Cookbook
This page contains a number of recipes related to Adafruit IO which have been found useful in the past. You can add and contribute to this file by filing an issue on the GitHub repository, or by editing this file and submitting a pull request.
Feed Identifiers
Names are for humans.
Keys are for computers.
You tell the computer the name, and it will tell you the key.
When using Adafruit IO, you'll want to tell the client (the computer) the feed's key instead of the feed's name.
For more information about this topic:, visit the learn guide for feeds or the IO Development blog post about naming feeds.
Formatting values
Adafruit IO stores all data as UTF-8 strings without applying formatting. Some data is formatted when rendered on dashboards, but you should always be able to get back what you sent.
Floating Point Data
If you're sending 3.1415 but you only want to see 3.14 - reduce the value to the desired amount of precision in your code. You can round (up or down) or truncate this value to get it in the format you want Adafruit IO to display.
Image Data
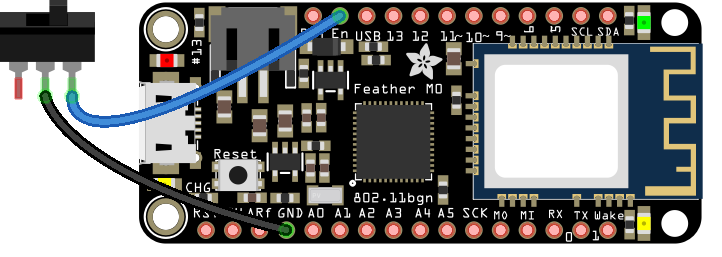
Using an Image Block on an Adafruit IO, you can automatically display a Base64 image data string on your dashboard by sending a Base64 image data string to an Adafruit IO feed. By dragging and dropping an image onto the block in your browser, you can also send image data on the same feed.
Design Considerations
There are some important things to keep in mind when using this feature. Normal feeds are limited to 1KB of data, or about 1024 bytes, for publishing. Turning off feed history from the feed settings page allows publishing up to 100KB, or 102400 bytes, of data.
When using the drag-and-drop feature of Adafruit IO dashboards or feed pages, image conversion from binary to Base64 happens inside the browser. That means no image pre-compression or optimization and additional size boost due to the conversion from binary to Base64.
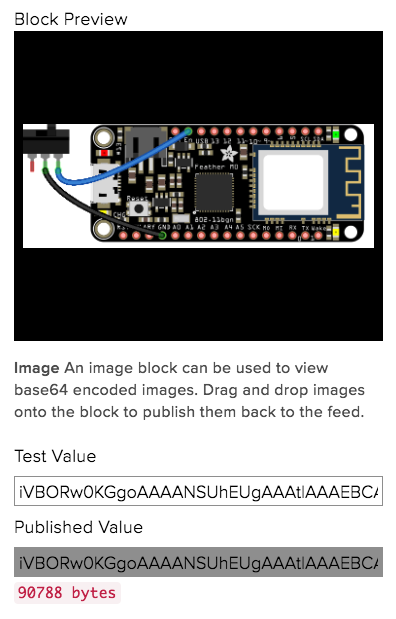
You’ll have to do your own testing to figure out what an appropriate image size and format (png, gif, or bmp) for you are. For example, the .png image used for testing below has an on disk size of 68089 bytes, but a Base64 value of 90788 bytes, an expansion factor of about 150%, which is really close to the limit.
Flat colored .png images are particularly well suited to small image sizes. The image below is 1024 x 768 pixels and was run through the ImageOptim tool. The base size on disk is 10665 bytes and the Base64 encoded size is 14221 bytes.

By optimizing heavily with imagemagick, I was able to get an image under 1024 bytes. The gif below is 703 bytes on disk and 941 bytes when converted to Base64, so it will work even on feeds with history turned on.
# on macOS 10.14 with ImageMagick 6.9.9-37
$ convert small-image-with-text.gif -colors 3 \
    -strip -coalesce -layers Optimize \
    small-image-with-text-optim.gif
$ base64 -i small-image-with-text-optim.gif \
    -o small-image-with-text-optim.gif.base64

Publishing Image Data
Here's an example Python sketch that publishes image data to an Adafruit IO feed when a signal is received on another IO feed.
The two most important factors for published image data size are image resolution and image formatting. The Python Imaging Library (pillow) allows us to resize images and has built in support for jpeg optimization.
The key chunk of code is here:
# create an in-memory file to store raw image data
stream = io.BytesIO()

# write camera data to the stream (file)
camera.capture(stream, format='jpeg', resize=(800, 600))
stream.seek(0)

# use Python Imaging Library to optimize the final image data
image = Image.open(stream, 'r')
optim_stream = io.BytesIO()
image.save(optim_stream, format='jpeg', quality=70, optimize=True)
optim_stream.seek(0)

# convert image binary data to base64 string
value = base64.b64encode(optim_stream.read())

if len(value) > 102400:
    print("image file too big!")
    return

client.publish('image-stream', value)
We create an image, optimize it, convert it to a Base64 string, and then immediately publish that string to Adafruit IO. It's also worth noting that we never save the image file to disk, it is only ever present in memory, which saves a bit of wear-and-tear on our Raspberry Pi microSD card.
If you wanted to do the same from a single command line command, given an existing image file, you could use curl's support for uploading files from stdin:
$ base64 image.jpg | curl -F value=@- -H "X-AIO-Key: {io_key}" \
    https://io.adafruit.com/api/v2/{username}/feeds/{feed_key}/data
The -F value=@- tells curl, "I want to POST a multipart form with a single parameter named 'value' whose value is the input to this command." The preceding base64 command and the | character mean that the input to the curl command is the base64 string version of the binary image data.
Stop by the forums if this leaves you with questions or if you're looking for examples in your favorite programming language :D
Sending and Storing JSON
// A basic data record
{
  "value": 22.587,
  "lat": 38.1123,
  "lon": -91.2325,
  "ele": 112
}
Because Adafruit IO supports additional features beyond a basic MQTT brokering service, such as location tagging for data points, the service supports data in the JSON format described in the HTTP create data API description.
This lets us store the individual value, 22.587, and data about the value: its latitude, longitude, and elevation. Data about the data is "metadata"!
But what happens when the value you want to send is itself JSON? Good news! There are a few solutions available to you in that situation.
Double encoded JSON strings
The safest way to can send JSON data as a value is to "double encode" it before sending, in which case IO will treat it as a raw string. If you're using something like javascript's JSON.stringify function or Ruby's JSON.generate, double encoding means passing the result of JSON.stringify through JSON.stringify a second time.
JSON.stringify({
  "value": JSON.stringify({"sensor-1":22.587,"sensor-2":13.182})
})
The double encoded JSON string can be sent directly through Adafruit IO without interference from our processing system, because the processing system will not interpret it as JSON. In your receiving code, because the value passed through includes surrounding double quotes, you have to call your parse function twice to restore the JSON object.
Important Note: Data saved in this manner (multiple records saved as JSON in a single feed) will make the data unusable by the IO dashboard and other features such as actions. IO needs a single value saved into a feed in order to use it in this manner. Saving the JSON objects into a feed is a useful feature if you only need to use the data between two devices, for example.
var data = JSON.parse(message)
var value = JSON.parse(data.value)
IO formatted JSON
{
  "value": {"sensor-1":22.587,"sensor-2":13.182},
  "lat": 38.1123,
  "lon": -91.2325,
  "ele": 112
}
The simplest way to send JSON data to Adafruit IO is include it directly in the datum formatted record you send to IO. For example, if instead of 22.587, I wanted to send something like, {"sensor-1":22.587,"sensor-2":13.182}, the "wrapped" version would look like the value on the right.
It's worth noting that because Adafruit IO parses the entire JSON object that you send it, any valid JSON will be parsed and when it is stored in our system and forwarded to any subscribers, it will be regenerated. The significance of that is that if you publish JSON data with whitespace, it will be stored and republished without whitespace, because our generator produces the most compact JSON format possible.
Non-IO formatted JSON
curl -H "Content-Type: application/json" \
    -H "X-AIO-Key: toomanysecrets" \
    --data '{"sensor-1":22.587,"sensor-2":13.182}' \
    https://io.adafruit.com/api/v2/username/feeds/feed-key/data
Another way you can send raw JSON data is to just send it. If Adafruit IO doesn't find a "value" key in the JSON object you send, it will treat the whole blob as plain text and store and forward the data. That means with our example JSON object, sending the string {"sensor-1":22.587,"sensor-2":13.182} will result in {"sensor-1":22.587,"sensor-2":13.182} being stored in IO and sent to MQTT subscribers.
NOTE: This solution is the riskiest, because if your JSON blob includes the key named value, then IO will interpret that as the value you want to store and ignore all the other keys.
That's not JSON at all!
If you want to be absolutely sure that Adafruit IO will not interfere with the data you're sending, encode it as a Base64 string first.
btoa(JSON.stringify({ "something": "here" }))
// "eyJzb21ldGhpbmciOiJoZXJlIn0="
atob("eyJzb21ldGhpbmciOiJoZXJlIn0=")
// {"something":"here"}
This solution is also ideal if you want to store or send binary data with Adafruit IO. You won't get to see any pretty charts (although we do display base64 encoded images), but your data will remain exactly the way you left it.
Webhook Receivers
Webhook receiver URLs give you a limited use, unique API address that you can send data to and have it appear in your Adafruit IO feed. Webhook URLs can be shared with anyone and used from anywhere on the web.
You can access a webhook by navigating to your feed and clicking the Webhooks button on the right-hand sidebar.
Raw Webhooks
If you want to receive the whole contents of webhook events--for example, when receiving webhook notifications from a service like Slack or GitHub where you don't have control over the payload the service is sending--add /raw to the end of the Adafruit IO webhook URL that you share with the service.
Notify Webhooks
If you only want to be notified that an event has happened, rather than have to handle all the data from an event--for example, if a service like GitHub is trying to send 7KB of JSON to your ESP8266--add /notify to the end of your Adafruit IO webhook URL. When data arrives, your feed will receive the message "ping".
Securing your IO Account
Your IO Account includes a secret API key. This key is private and should not be shared with anyone.
But, a common pitfalls of the key is it may be accidentally shared by posted code on GitHub or social media. If anyone gains access to your key, they will have access to your Adafruit IO account.
I accidentially shared my key, what do I do now?
You'll need to generate a new key. This process is simple, but not reversable. Once you generate a new key for your Adafruit IO account, all devices using the previous Adafruit IO key will need to be updated to the new key.
To rengenerate your Adafruit IO Key: * Navigate to io.adafruit.com and log into your account. * Click the key icon on the header. * Click the "Regenerate Key" button and confirm the action. * The value of "Active Key" will change to a new key. Replace all instances of the previous key with the new one.